WiX defines a property element that can be used to store arguments passed to the MSI.
To be able to set the property value using an MSI argument, the property must be public (public property names cannot contain lowercase letters).
When we want to pass the install location to the MSI, we do not need a property.
According to this article, we can use the Directory element directly and write its Id
"in all capital letters to make it a public property that can be set from UI or via the command line".
In this example, both approaches are used:
<Property Id="MY_PROPERTY" Value="default value" />
...
<Directory Id="MY_INSTALL_LOCATION" Name="03_PassingInstallLocationParameterToInstaller" />
MY_PROPERTY will simply be saved to Windows Registry.
MY_INSTALL_LOCATION will be used as the installation location.
MSI can be invoked by double-clicking it - this will call the MSI without parameters and the default value will be used for MY_PROPERTY and MY_INSTALL_LOCATION.
If MSI would have a user interface, non-default value for the custom property and install location could be entered there.
MSI without a UI can receive parameters by using MsiExec.
Following PowerShell command line will:
- create a log file that includes verbose information about the installation in the folder where MSI is located (/L*V "installation.log")
- install the MSI (/i "03_PassingInstallLocationParameterToInstaller.msi")
- pass values for properties MY_PROPERTY and MY_INSTALL_LOCATION to the MSI
MsiExec /L*V `"installation.log`" /i `"03_PassingInstallLocationParameterToInstaller.msi`" MY_PROPERTY=`"my value`" MY_INSTALL_LOCATION=`"c:\Example 03`"
NOTE: For the command line to work in CMD, backtick escape characters need to be removed:
MsiExec /L*V "installation.log" /i "03_PassingInstallLocationParameterToInstaller.msi" MY_PROPERTY="my value" MY_INSTALL_LOCATION="c:\Example 03"
When MSI is installed using the above-listed arguments, the following lines can be found in the installation.log file:
MSI (c) (CC:40) [18:43:54:135]: PROPERTY CHANGE: Modifying MY_PROPERTY property. Its current value is 'default value'. Its new value: 'my value'.
MSI (c) (CC:40) [18:43:54:135]: PROPERTY CHANGE: Adding MY_INSTALL_LOCATION property. Its value is 'c:\Example 03'.
...
MSI (c) (CC:40) [18:43:54:166]: Switching to server: MY_INSTALL_LOCATION="C:\Example 03\" TARGETDIR="D:\" MY_PROPERTY="my value" ...
...
MSI (s) (20:3C) [18:43:55:479]: PROPERTY CHANGE: Adding MY_INSTALL_LOCATION property. Its value is 'C:\Example 03\'.
MSI (s) (20:3C) [18:43:55:479]: PROPERTY CHANGE: Modifying MY_PROPERTY property. Its current value is 'default value'. Its new value: 'my value'.
"Switching to server" indicates that the user was presented with a UAC prompt.
The following line at the end of the file indicates if the installation succeeded or not:
Installation success or error status: 0.
Error code 0 indicates that "The action completed successfully." and error code 3010 indicates that "A restart is required to complete the install.".
All other error codes indicate that the installation failed (see here for more details).
If the installation failed, the easiest way to find why it failed is to look for "value 3" in the log file.
Orca is an MSI Editor with a graphical user interface.
It can be used to view and edit the content of an MSI - e.g. Files, Directories, Properties, Features, Components...
It can also be used to execute ICE validation of an MSI.
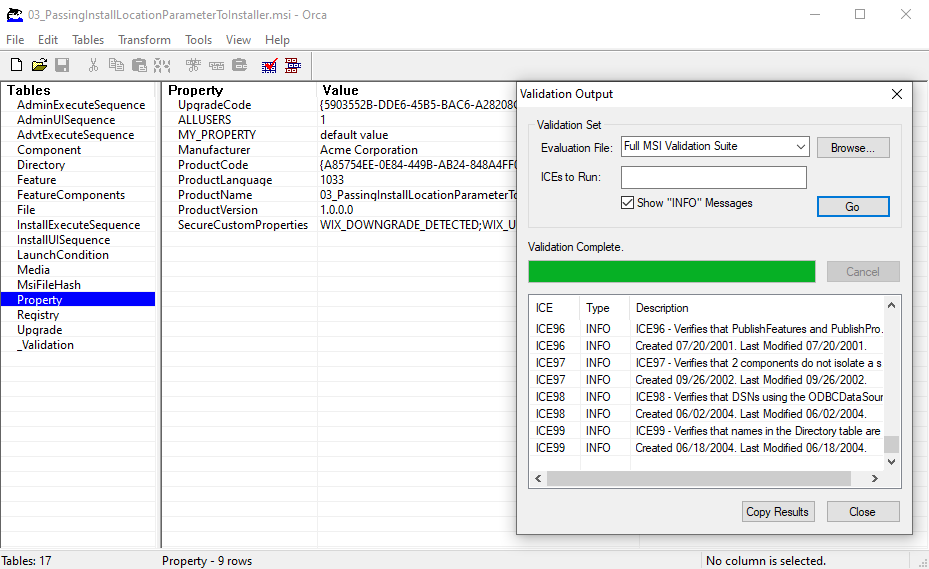
Orca is available as part of Windows SDK or it can simply be downloaded from here.
Upgrade, repair and uninstall of MSI are usually not initiated by calling the MSI directly and passing parameters to it.
Still, sometimes it might be needed to access property values (passed to the MSI during initial installation) at the time of upgrade, repair or uninstall.
This is something that does not work in the current example but will be supported in the next example.